


- NEW DVD Series – Stone Setting with Bezels
- Tube Set Charm by Kim St. Jean
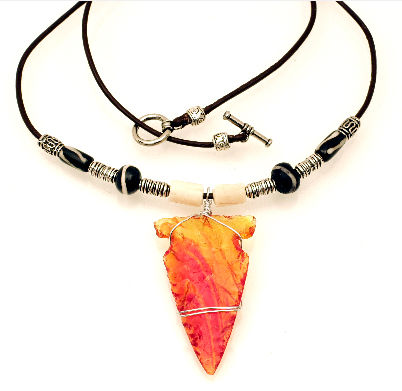
- Prong Basket Pendant by Kim St. Jean
- NEW DVD Series – Stone Setting with Cold Connections
- New DVD Series – Stone Setting with Wire
- NEW DVD Series: Introduction to Stone Setting by Kim St. Jean
- Featured Tool: Bracelet Bending Plier
- NEW Dvd by Eva Sherman
- Fun, Fast Fold Forming DVD Series
- Double Band Ear Cuff from Alex Simkin
Take Photos of your Wire Jewelry using a Lightbox – Part 2

by Mike Ault
In Part 1 we demonstrated how you, as a wire jewelry maker can make a Lightbox for photographing your pieces for displaying on the Internet. Part 2 is about how to use it.
 Once you are ready to begin, see if your camera allows adjustment of white balance. White balance will either be done as preset types of light (incandescent, tungsten, sunlight, cloudy, florescent, etc) or as temperature. Using the 500 watt halogen work lights you will want to use the incandescent/2800-3500K setting. If you use a manual capable camera, play with the exposure settings. I like to use a f/11 setting to give a good depth of field and an exposure setting that yields close to the proper white. You may find you need to really over-expose the image to get whites truly white and this will blow out the highlights on silver or gold. Set to get as close as possible without blowing out the high lights. Do not despair!
There are many editing programs available that allow you to adjust levels, I use Photoshop version 5.5 (PS). In PS you can remove dust, clone out unwanted lines and shadows, sharpen and adjust levels. In a point and shoot type camera, as long as you keep the lens clean you shouldn’t have dust issues, since I use a DSLR I have to periodically clean the sensor or use PS to remove the dust that invariably shows up after a few lens change outs. My usual workflow in PS goes something like this:
- Rotate (I like portrait, unfortunately the default in most cameras is landscape)
- Crop (if needed)
- Resize to standard size (if needed)
- Adjust Levels
- Clone out dust and unwanted lines/shadows
- Show grid (if needed)
- Free Transform(CTL-t) –rotate (to get it aligned up and down) (if needed)
- Hide grid (if needed)
- Clone out transform artifacts (if needed)
- Adjust brightness/contrast
- Adjust sharpness with Unsharp Mask(I use Amount 100%, radius 5.0 pixels, threshold of 9, adjust amount up and down to get the level of sharpness you desire)
- Save under different name (do not over-write the original!)
- Save for web appending size to name, in save for web you can adjust the size of file at a specific pixel dimension set (1024×682 for example) by adjusting the Quality setting.
The best way I have found to get your background white (if that is the color it is!) is to bring up the manual level adjustment and follow these steps:
- Under the level graph will be three sliders, one on the left, one on the right and one in the middle, after selecting what part of the image should be the whitest white, using a shift-click, grab the one on the left and slide it all the way to the right, the image should go nearly all black.
- Select the dropper on the right, it should be white.
- Using the dropper place it where your whitest white occurs and click, your image should come back with whites where they are supposed to be.
- (Some times the next steps are optional, you can stop at 3 if the picture looks good!) Decide where the blackest black should be. Now slide the right hand slider all the way to the left.
- Select the left hand dropper (it should be black inside) and then place it where the blackest black should be and click. This should set the blacks to black.
If step five messes up your picture use a CTL-z to get back to the previous step and try again.
Practice with camera settings and in Photoshop (or your editor) until you feel comfortable. I found using a tripod really helps keep the picture in focus and helps with camera shake. Three wooden TV trays work great to hold the light box and the two work lights.
Once you are done, simply disassemble the light box and stow it in the back of a closet until you need it again.
If you missed out on Part 1 of Taking Photos of your Wire Jewelry using a Lighbox – Click Here!
Related Posts

39 Comments

Wire Jewelry Ideas
-
 See Yourself as a Creative Thinker-Part IV By Karen Meador, PhD
Wire Jewelry Article for September 27th, 2017 If...
- September 27, 2017
-
 See Yourself as a Creative Thinker-Part III By Karen Meador, PhD
Wire Jewelry Article for September 20th, 2017 If...
- September 20, 2017
-
 See Yourself as a Creative Thinker-Part II By Karen Meador, PhD
Wire Jewelry Article for September 13th, 2017 If you...
- September 13, 2017
-
 See Yourself as a Creative Thinker By Karen Meador PhD
Wire Jewelry Article for September 6th, 2017 This is...
- September 6, 2017

Design & Inspiration
-
 Free Pattern: Smile Cluster Necklace by Karen Meador
by Judy Ellis, Wirejewelry.com Wire Jewelry Pattern for August...
- August 7, 2017
-
 Free Pattern: Long crystal round maille earrings by Kylie Jones
by Judy Ellis, Wirejewelry.com Wire Jewelry Pattern for August...
- August 3, 2017
-
 Free Pattern: Stone Twist Wrap by Karen Meador
by Judy Ellis, Wirejewelry.com Wire Jewelry Pattern for July...
- July 31, 2017
-
 Free Pattern: Floating Bead Earrings By Kimberly Newman
by Judy Ellis, Wirejewelry.com Wire Jewelry Pattern for July...
- July 27, 2017
Featured Tools
-
 Get to Know Your Hand Tools – Tube-Cutting Jig By Helen I. Driggs
by Judy Ellis, Wirejewelry.com Wire Jewelry Tip for August...
- August 4, 2017
-
 Wire Jewelry Video: Using Punch Pliers by Judy Freyer Thompson
by Judy Ellis, Wirejewelry.com Wire Jewelry Tip for August...
- August 2, 2017
-
 Wire Jewelry Video: Aligning a Hole Punch by Judy Freyer Thompson
by Judy Ellis, Wirejewelry.com Wire Jewelry Tip for July...
- July 26, 2017
-
 Get to Know Your Hand Tools – Wire Cutters – Helen I. Driggs
by Judy Ellis, Wirejewelry.com Wire Jewelry Tip for July...
- July 25, 2017
Deb Soromenho
September 25, 2009 at 1:42 pm
Thanks so much for the white bg tip! I knew the whitepoint ability existed, just never knew how to actually get it to work!
~deb
Karen McCoun
September 27, 2009 at 9:25 am
What I need the most is better photos! But, I don’t want to make the box. Is there anywhere I could buy a white box that is economically priced?
teresa rothove
June 23, 2013 at 11:03 pm
hi karen I just bought a lightbox at Jack’s camera shop. (jackscamerashop.com) cost me almost $100. I’m in philadelphia, pa. I shouldthink you can go online and get it or go to your favorite camera shop. I don’t think target or walmart carries anything light what we need.
I can tell you that with the instructions that I got from the camera shop and from here I can definitely see my pic are starting to look better.
good. luck to you.
teresa
Susan Ertel
September 28, 2009 at 12:03 pm
Wait …..You didn’t tell us how to set up the jewelry. What do we do with the piece of glass and the strips. I need more help, just a novice with picture taking. Susan in TX
MIke Ault
October 20, 2009 at 3:38 pm
For the stage you just lay the two white strips down at the same width as the glass then place the glass on top of them. At most you my have some partial off white lines to clone out. With good closeup shots you will probably not have that. To eliminate the seam from the back and bottom pieces meeting, use a piece of white poster board and just lay it on the bottom and up the back with a curved side hiding the seam. Put the 1×6 inch strips on top of the poster board and the glass on top of them.
MIke Ault
October 20, 2009 at 3:46 pm
Most large camera stores carry a light/white box of some sort. You can also look at:
http://www.adorama.com/VRDSB16T.html?searchinfo=light+box
http://www.bhphotovideo.com/c/product/600440-REG/MyStudio_MS20_MS20_Tabletop_Photo_Studio.html
Mike
MIke Ault
October 20, 2009 at 4:02 pm
I usually just arrange the jewelry (necklaces) towards the center of the glass stage and then use an extended tripod to shoot down through the upper camera port.
Another source of a “light shed” including lights and backgrounds:
http://www.bhphotovideo.com/c/product/600440-REG/MyStudio_MS20_MS20_Tabletop_Photo_Studio.html
Mike
tracey
October 28, 2009 at 2:19 pm
if you want to jus buy one i got mine cheap as from ebay
mary bailey
October 28, 2009 at 4:06 pm
Thanks for the great tips! I have got to buy a new digital camera to replace my Minolta that is so old and uses floppies. Any recommendations regarding this?
I recently bought a small white photo cube to try out and these tips will be greatly appreciated.
Still wish pages like this had a “printer friendly” option so I could keep it in a notebook.
Mary in Tennessee
Michael Levine
October 29, 2009 at 12:36 am
LTD Commodities is selling an inexpensive light box for 39.95. It includes 2 halogen lights, a mini tripod, 2 backgrounds (light and dark)and carrying case. THe unit breaks down to a flat carry. I just saw the unit and ordered it yesterday, so I haven’t seen it actually yet. When I get it, I will let you know how it is.
Jacki
May 15, 2012 at 7:48 am
I bought one of these beauties and I love mine. My images come out looking very nice. I also have a good camera (Olympus)with macro capabilities and it really helps with the quality as well.
Jack
February 20, 2010 at 3:36 pm
No matter how low the cost, nor how easy to assemble, one cannot make up for the bane of human laziness. *le sigh*
I thought this project was brilliant and the delivery totally helpful. I can’t wait to build my own. Thank you so much for the tips!
Dawn Sears
March 23, 2010 at 6:02 pm
I purchased a studio lighting tent. It has 2 halogon, tripod and 4 different colors back drops. It is folded up when not in use. I purchased at THELASHOP.COM for $49.95. I was unaware of a light box until I got the tip and it sounded just like what I needed. Just came 2 days ago and looking forward to using it. Thanks for all the tips from everybody.
DeLane
May 19, 2010 at 11:04 am
Do you not use a light in front or in back to get depth? I have used a very small spot or pen light to get accent on the back or front piece. And I never use white or black for a background. It does nothing for my jewelry. I use a gradation gray sheet which will adds to the depth of the total picture. And, do you photograph earrings? I found a great site recently on how to photo earrings hanging them from a fine monofilament line strung acros the top of the light box, so the earrings hang down. It was great. Wish I could remember where it was! I’ll see if I can find it. Yours is a Good photo box, tho.
Cristina - Sunshine's Creations
May 27, 2010 at 7:16 am
Hi!
Here’s another tip I learned from a photographer friend: Along with the tripod, use the timer! I set mine to 2 seconds.
This allows you to take your hands off the camera, thus preventing the shaking of the hands getting your picture blurry.
Cris
Ali
July 9, 2010 at 7:03 am
Goodness, this seems complicated. I have a lightbox – but it seems like using it is going to be quite the task!
Can someone simplify the use of a light box for me? I’ve never used one before but really want to get good photos!
Thank you!
Carol Wilson
July 23, 2010 at 12:13 pm
Great information, Mike! I can’t wait to try it. FYI to Mary Bailey, I use a combination of select/copy/paste of what I want and the Print Scrn button, both into a Word document. Then just edit it so it looks good and voila! print it. I save everything useful that I find that way.
Doris
July 23, 2010 at 2:14 pm
Great tips for making and using a light box. I bought one, but have been hesitating using it. Now I know what to do and the mono filament idea is priceless! Thanks,
Doris
Carol Tardiff
August 17, 2010 at 12:34 pm
Mike… Thank you so much! This has to be the most thorough and user-friendly article I’ve ever seen on making and using a light box. I can hardly wait to buy my supplies and get started! My favorite thing about being an artist is the generosity of other artists and the joy of sharing a new discovery or technique. I will surely be passing along a link to this article. Thanks again!!
Patricia
January 9, 2011 at 8:09 am
I’m always interested in new ideas. I do have one question, though. I use PhotoImpact 8 rather than photoshop, so I’m not familiar with the terminology. What do you mean by “clone out?”
When I have to clean images of dust I just retouch them (paint them in with the smallest pixel sized paintbrush necessary). For removing the background in order to paint in my own, I used to do erasings but now I use the mask and paint out the jewelry then transfer the jewelry to a new transparent image.
Thanks!
dalecgr
January 9, 2011 at 12:42 pm
Hi Patricia, I think you meant ‘cut out’, which simply means that I cut/delete/erase the entire background around the item as well as in the tiny spaces that may be part of the design like loops, etc. One of the reasons I cut the background out is so I can add a drop shadow to enhance details, adding a more 3-D appearance.
Nisha
February 4, 2011 at 1:42 pm
Hi Mike; Really informative, thanks very much. We’ve had a trial run based on both the articles and the results are much better than we could have anticipated. I wondered if you had any tips regarding complete removal of shadows other than those posted as if I try to enhance further using your suggested tips I lose some of the clarity particularly with regards to the silver and pear pieces we make.
~Nisha
Vivian
February 15, 2011 at 1:49 pm
Thank you very much for this great idea. I was wondering, how can I use a black background with this box? and is a white background better than a black one?
Vivian
dalecgr
February 15, 2011 at 3:55 pm
Hi Vivian, although I do not use this type of light box, I do know that black will absorb light and depending on what you are shooting, may work better than using white which would/could give a nice gradient background. After you experiment (by just using a piece of black paper) would you please post your results? Thanks!
Jim Seaberg
October 14, 2014 at 5:57 am
Just go to the nearest sewing center or Wal-Mart or Hobby Lobby and by cloth of whatever color you want for the background. (Purple and dark blue work well for silver in particular.)
Allison Lundahl
June 30, 2011 at 12:33 am
I made this light box, didn’t do a good cut job so my boyfriend redid it making sure to cut the slots neatly and bada bing it works phenomonal!! I couldn’t be happier and I have purchased 3 commerical store bought light tents that cannot hold a candle to this set up. We used those reflector lights you buy at Walmart and put 150 watt daylight bulbs in each of the 3. Ted built a base to clamp them on. It works like a dream. I love it!! Thank you so much for architec’g it.
Allison
dalecgr
June 30, 2011 at 9:41 am
Hi Allison, yes taking good shots of our work is so important and can be so darn difficult! The WS staff and I are very pleased that this article has helped you so much!
Have a great weekend!
Dale
herb fellows
July 10, 2011 at 9:55 am
In your picture, the 500w halogen light seems to be 6 inches away from the fabric. This will almost definitely start a fire!
Please specify the distance needed to avoid this, and also a note of extreme caution when using these.
These lights get really hot and need to be watched for both fire and for touching, you can get severe burns from these.
Lorry Norton
January 14, 2012 at 2:09 am
So, do the lights just shine through the lightbox from the outside? That was never discussed, unless I missed it…is there a way to install a light inside the box?
Rose
January 16, 2012 at 12:34 pm
Hi Lorry,
As you can see in the pictures in Part 1, the lights are on the outside, shining through the fabric-covered vents. The fabric serves to soften the light. You could install lights, but the point of the lightbox is to create a consistent light environment with diffused surrounding light rather than harsh light and shadows.
Hope that helps!
Rose
Lorry Norton
February 11, 2012 at 2:15 pm
Another question…could you use a cardboard box and make it white inside (painting it, lining with white fabric, etc), and have the holes cut out with the fabric over the holes for the light to shine through? Would something like that work?
Rose
February 15, 2012 at 10:40 am
Hi Lorry,
In my lightbox, I used a cardboard box, cut holes in the top and sides, and put tissue paper over the holes. For the inside, I attached a piece of white posterboard (from the grocery store in the school supply section). I probably wouldn’t recommend painting it (I have a black posterboard too, that I can exchange for the white when I need it), but fabric would probably be ok for the hole coverings (as long as it still allows light through) and the inside of the box. Ultimately you’ll just have to experiment – good luck!
Rose
Jackie Woodward
April 24, 2012 at 8:43 pm
I am interested in making the light box and am in the market for a new camera what features do you recommend to look for and what do you use? Thanks Jackie@jackiearts,com
Teresa Rothove
June 12, 2013 at 8:12 am
I want to thank you for your time in sharing your expertise with us.
In sharing this information we will be able to put better pics on our sites. Our pics will help people be able to see our designs and choose their next piece of jewelry.
Thank you again and keep out tips coming.
teresa rothove
June 23, 2013 at 11:07 pm
hi karen I just bought a lightbox at Jack’s camera shop. (jackscamerashop.com) cost me almost $100. I’m in philadelphia, pa. I should think you can go online and get it or go to your favorite camera shop. I don’t think target or walmart carries anything like what we need.
I can tell you that with the instructions that I got from the camera shop and from here I can definitely see my pic are starting to look better.
good. luck to you.
teresa
Ginger
November 16, 2013 at 2:24 pm
I made mine and it looks great! Two questions. what kind of light should I be using for the top hole that was cut out for a light?
And should I be taking pictures from the top or front?
I am a novice at this, but want to succeed.
Sarah Stewart
January 13, 2014 at 11:38 am
I built one and I absolutely love it. The directions are very easy to follow and your tips are wonderful. I am just going to add a third light at the top to give it a bit more brightness. My pictures are already looking better. I also bought a mini tripod at walmart for $9 when I was buying the materials to create the box. Thanks for such a great bit of advice.
Jim Seaberg
October 14, 2014 at 6:08 am
I am trying to b ecome a professional phlotographer who makes the occasional piece of jewelry. Obviously this box can be used for other things than just jewelry such as anything small enough to fit. e-bay pictures of any item work great. I would suggest that unless you want to invest a lot of money in a camera (mine cost over $1000 on sale!) just get a small point and shoot one that is inexpencive. you will definatly need a tri-pod as the shutter speed needs to be slowed if possible. You can shoot from the front and I do more than from the top. I use different colored clothes to line the box with depending on the background I need. Cloning is a step in Photoshop for removing unwanted small spots. I hope this helps with many of the questions I have read.
Lisa
October 5, 2016 at 8:22 am
I just wanted to throw out a website called ‘Fotofuze.’ You put your picture in it after it’s been edited however you like, then highlight the picture, and it keeps the picture the same and whitens the background for you and you get to keep your shadows. You can adjust the whiteness as well through to gray if you like, plus a couple other little things like brightness. I’ve never used PS, so I can’t speak to that but this fotofuze has helped me tremedously. It allows me to just concentrate on how the object looks and not worry about overexposure or if the background is too dark.