


- NEW DVD Series – Stone Setting with Bezels
- Tube Set Charm by Kim St. Jean
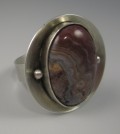
- Prong Basket Pendant by Kim St. Jean
- NEW DVD Series – Stone Setting with Cold Connections
- New DVD Series – Stone Setting with Wire
- NEW DVD Series: Introduction to Stone Setting by Kim St. Jean
- Featured Tool: Bracelet Bending Plier
- NEW Dvd by Eva Sherman
- Fun, Fast Fold Forming DVD Series
- Double Band Ear Cuff from Alex Simkin
All posts tagged "how to make jewelry"
-
 Live Streaming Classes from Tucson
by Judy Ellis, Wirejewelry.com Wire Jewelry Class Information for January 16th, 2017 Live Streaming Classes from Tucson I have some VERY EXCITING NEWS! This has NEVER happend before in Tucson AZ 6 Additional Tucson Gem Show Classes...
- Posted January 16, 2017
-
 How to Make a Bead Link
by Judy Ellis, Wirejewelry.com Wire Jewelry Tip for December 2nd, 2016 How to Make a Bead Link by Marilyn Gardiner Today we have a great tip on how to make a simple Bead Link. Enjoy! Marilyn Says:...
- Posted December 2, 2016
-
 Discover JOGS 2017
by Judy Ellis, Wirejewelry.com Wire Jewelry Tip for September 26th, 2016 Discover JOGS 2017 Every year, we take two weeks and we leave the cold and snowy weather or Utah, along with our sister sister company JewerlyTools.com,...
- Posted September 26, 2016
-
 FREE Pattern: Teardrop Earrings and Pendant
by Judy Ellis, Wirejewelry.com Wire Jewelry Free Pattern for August 24th 2016 Teardrop Earrings and Pendant by Judy Larson Today we feature another of Judy Larsons Template projects. This pattern utilizes two of her templates – the...
- Posted August 24, 2016
-
 How to Measure a Ring for a Soldered Band
by Judy Ellis, Wirejewelry.com Wire Jewelry Tip for November 16th, 2015 How to Measure a Ring for a Soldered Band by Kate Richbourg The holidays are quickly approaching and today Kate gives us a great tip that...
- Posted November 16, 2015
-
 How to Open and Close Jump Rings
by Judy Ellis, Wirejewelry.com WireJewelry Tip for November 4th, 2015 How to Open and Close (Jump) Rings by Marilyn Gardiner We are fortunate to have Marilyn Gardiner as one of our contributors and today we share one...
- Posted November 4, 2015
-
 2015 Tucson Jewelry Classes at JOGS
by Judy Ellis, Wire-Sculpture.com Wire Jewelry Resource Tip January 9, 2015 NEW Instructors at JOGS Many of you take a few days every year and visit a little Jewelry show in Tucson called JOGS! This year, our...
- Posted January 9, 2015
-
 Daily Wire Tip August 30: Spray Polish for Organic Materials
Daily Wire Jewelry Making Tip for August 30, 2011 Question: I read a while back on one of your answers to a question about a spray polish that you can use on organic materials. Could you tell...
- Posted August 29, 2011
-
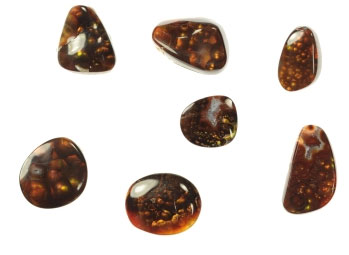
 Daily Wire Tip August 29: What are Abalone and Paua Shells?
Daily Wire Jewelry Making Tip for August 29, 2011 Question: Can you tell me the difference between Abalone and Paua Shell? -Diane in Port Charlotte, Florida Answer: Abalone cabochon left, and paua shell cabochon, right; the paua...
- Posted August 29, 2011
-
Cool Anklets are HOT!
by Dale “Cougar” Armstrong, Wire-Sculpture.com A gentleman/student-friend of mine, Jack from New Jersey, sent me an email the other day, asking about anklets. You have all heard me say that a lot of my personal inspiration comes...
- Posted August 3, 2010
-
Daily Wire Tip July 29: Wire Gauge for Hoop Earrings
Daily Wire Jewelry Making Tip July 29, 2010 Question: What gauge of wire do I use for hoop ear rings? Everything I try seems to be too light. -Cookie in Atlantic City, New Jersey Answer: The size...
- Posted July 28, 2010
-
Daily Wire Tip July 26: Pattern Help
Daily Wire Jewelry Making Tip July 26, 2010 Question: A few patterns I have call for 14-gauge “twisted wire,” with no further explanation. Does it mean a 14-gauge square or half round wire, twisted? I also have...
- Posted July 25, 2010
-
Daily Wire Tip July 22: Free Jewelry Education
Daily Wire Jewelry Making Tip July 22, 2010 Question: I want a free e-course on jewelry making for beginners which covers the basics for making a necklace, chain, bracelet, earring etc. Your help in this regard would...
- Posted July 21, 2010
-
Daily Wire Tip: Tiny Gemstones and Buying by Carat Weight
Daily Wire Jewelry Making Tip Question: I recently bought three Yellow Mexican Labradorite 1.5mm faceted gemstones (they’re beautiful!) I saw on TV, but they looked much larger than what I ended up with. I was hoping to...
- Posted July 17, 2010
-
Daily Wire Tip July 17: Hardening Wire Wound with Pearls
Daily Wire Jewelry Making Tip July 17, 2010 Question: I do a lot of wirewrap in making my necklaces. I want to harden the wraps, but am afraid of tumbling because most of my necklaces have glass,...
- Posted July 16, 2010
-
Daily Wire Tip July 15: Developing a Wire Instinct
Daily Wire Jewelry Making Tip July 15, 2010 Question: I’m still trying to understand the uses of different gauges and shapes of wire and their uses. If I am pleased with how my design came out, whether...
- Posted July 14, 2010

Wire Jewelry Ideas
-
 See Yourself as a Creative Thinker-Part IV By Karen Meador, PhD
Wire Jewelry Article for September 27th, 2017 If...
- September 27, 2017
-
 See Yourself as a Creative Thinker-Part III By Karen Meador, PhD
Wire Jewelry Article for September 20th, 2017 If...
- September 20, 2017
-
 See Yourself as a Creative Thinker-Part II By Karen Meador, PhD
Wire Jewelry Article for September 13th, 2017 If you...
- September 13, 2017
-
 See Yourself as a Creative Thinker By Karen Meador PhD
Wire Jewelry Article for September 6th, 2017 This is...
- September 6, 2017

Design & Inspiration
-
 Free Pattern: Smile Cluster Necklace by Karen Meador
by Judy Ellis, Wirejewelry.com Wire Jewelry Pattern for August...
- August 7, 2017
-
 Free Pattern: Long crystal round maille earrings by Kylie Jones
by Judy Ellis, Wirejewelry.com Wire Jewelry Pattern for August...
- August 3, 2017
-
 Free Pattern: Stone Twist Wrap by Karen Meador
by Judy Ellis, Wirejewelry.com Wire Jewelry Pattern for July...
- July 31, 2017
-
 Free Pattern: Floating Bead Earrings By Kimberly Newman
by Judy Ellis, Wirejewelry.com Wire Jewelry Pattern for July...
- July 27, 2017
Featured Tools
-
 Get to Know Your Hand Tools – Tube-Cutting Jig By Helen I. Driggs
by Judy Ellis, Wirejewelry.com Wire Jewelry Tip for August...
- August 4, 2017
-
 Wire Jewelry Video: Using Punch Pliers by Judy Freyer Thompson
by Judy Ellis, Wirejewelry.com Wire Jewelry Tip for August...
- August 2, 2017
-
 Wire Jewelry Video: Aligning a Hole Punch by Judy Freyer Thompson
by Judy Ellis, Wirejewelry.com Wire Jewelry Tip for July...
- July 26, 2017
-
 Get to Know Your Hand Tools – Wire Cutters – Helen I. Driggs
by Judy Ellis, Wirejewelry.com Wire Jewelry Tip for July...
- July 25, 2017