


- NEW DVD Series – Stone Setting with Bezels
- Tube Set Charm by Kim St. Jean
- Prong Basket Pendant by Kim St. Jean
- NEW DVD Series – Stone Setting with Cold Connections
- New DVD Series – Stone Setting with Wire
- NEW DVD Series: Introduction to Stone Setting by Kim St. Jean
- Featured Tool: Bracelet Bending Plier
- NEW Dvd by Eva Sherman
- Fun, Fast Fold Forming DVD Series
- Double Band Ear Cuff from Alex Simkin
All posts tagged "jewelry supplies"
-
 Cover the Pliers
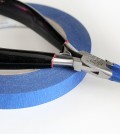
by Judy Ellis, Wirejewelry.com Wire Jewelry Tip for June 13th, 2016 Cover the Pliers by Albina Manning Today’s tip comes from Albina Manning. If you’ve ever worked with jewelry pliers, you know that sometimes too much pressure...
- Posted June 13, 2016
-
 Beautiful Gifts for Women
Daily Wire Inspiration May 1, 2015 Beautiful Gifts for Women Mother’s Day is right around the corner – and is celebrated around the world, in many cultures and religions. One relationship which is always with us...
- Posted May 1, 2015
-
 April Birthstone – The Diamond
by Judy Ellis, Wire-Sculpture.com Daily Wire Jewelry Tip April 8th, 2015 April Birthstone – The Diamond Diamonds – They might be more than just a girls best friend! As the April birthstone, diamonds are the ideal gift...
- Posted April 8, 2015
-
Gem Profile June 28: Jet
by Layna Palmer, Wire-Sculpture.com Jet Shop Jet Beads This week I think we’ll start with a road trip! We’ll be “leaving on a jet plane” destined for Whitby England, which is on the Yorkshire Coast. There we’ll...
- Posted June 28, 2013
-
Daily Wire Tip June 29: A Pattern Calls for Twisted Wire
Daily Wire Jewelry Making Tip for June 29, 2011 Question: I have a tutorial that calls for 16-gauge twisted wire. To make it myself, do I fold 16-gauge in half, then twist the two lengths together, or...
- Posted June 28, 2011
-
Daily Wire Tip June 28: Supply Lists for Wire Jewelry DVDs
Daily Wire Jewelry Making Tip for June 28, 2011 Question: Hi Dale, I am looking at purchasing your beginners video #1 (the wire bracelet), and I would like to order everything at once to get started with...
- Posted June 27, 2011
-
Daily Wire Tip Mar. 26: Keeping a Budget at Gem Shows
Daily Wire Jewelry Making Tip for March 26, 2011 Question: Hi Dale, I’m going to a very large gem and bead show in a couple of weeks. Every time I go to one of these shows, I...
- Posted March 25, 2011
-
Daily Wire Tip: Ultimate Jewelry Tool Shopping List
Daily Wire Jewelry Making Tip Question: Dale, I am sending my husband out the door with my Christmas list (yes, a Christmas list)! I want my jewelry making tools. I am learning how to wire wrap. I...
- Posted December 3, 2010
-
Daily Tip July 5: Soldering Gold Filled Wire
Daily Wire Jewelry Making Tip July 5, 2010 Question: Many years ago while in the Army, I made cab rings using silver soldered techniques. Is it possible to solder gold filled wire forms? -Bernard in McKees Rocks,...
- Posted July 4, 2010
-
Daily Tip: Is My Coral Real?
Daily Wire Jewelry Making Tip Question: How do I tell if a piece of red coral is real? -Pat in Aurora, Missouri Answer: Here are a couple of tests that you can do at home. Genuine coral...
- Posted June 16, 2010
-
Daily Wire Tip June 13: Attaching Beads to Tablecloths
Daily Wire Jewelry Making Tip June 13, 2010 Question: I bought from Wire-Sculpture 1 kilo bag of diverse beads. Got these because I needed heavy beads to make some table cloth weights to attach so winds won’t...
- Posted June 12, 2010
-
40% Off All CZs – Limited Time Sale!
Hi Wire Sculptors! As you may remember, we got a whole new shipment of sparkling Cubic Zirconia gemstones in a little while ago. We just love these little gems, and we bet you do, too! Well, I...
- Posted April 15, 2010
-
Jewelry Making Tools – Storage Solutions
One thing that’s common among wire jewelry artists, and anyone who works with beads, too, is the storage issue! You’ve got all this great wire, stones, and jewelry making tools, but where on earth do you put...
- Posted April 1, 2010
-
Intermediate DVD Series Release! – Jewelry Making Instructions
Hi there, Wire Sculptors! You know I want to keep you updated whenever something new comes along here at Wire-Sculpture.com. Well, I’ve got some great news. In the last month, we’ve been filming, printing, and packaging our...
- Posted March 30, 2010
-
February Gemshows in Tucson 2010
I hope you enjoy reading this article about our past experiences in Tucson, Arizona. But we can’t wait to see you at the upcoming Tucson 2013 Shows: specifically, the JOGS Show, where the Wire-Sculpture and JewelryTools.com crew...
- Posted February 17, 2010
-
Take Your Wire Jewelry Making to the Next Level!
We all yearn to achieve - it's human. The same can be said for the art of jewelry making - you want to get better and better at it. Is it just practice alone that...
- Posted September 10, 2009

Wire Jewelry Ideas
-
 See Yourself as a Creative Thinker-Part IV By Karen Meador, PhD
Wire Jewelry Article for September 27th, 2017 If...
- September 27, 2017
-
 See Yourself as a Creative Thinker-Part III By Karen Meador, PhD
Wire Jewelry Article for September 20th, 2017 If...
- September 20, 2017
-
 See Yourself as a Creative Thinker-Part II By Karen Meador, PhD
Wire Jewelry Article for September 13th, 2017 If you...
- September 13, 2017
-
 See Yourself as a Creative Thinker By Karen Meador PhD
Wire Jewelry Article for September 6th, 2017 This is...
- September 6, 2017

Design & Inspiration
-
 Free Pattern: Smile Cluster Necklace by Karen Meador
by Judy Ellis, Wirejewelry.com Wire Jewelry Pattern for August...
- August 7, 2017
-
 Free Pattern: Long crystal round maille earrings by Kylie Jones
by Judy Ellis, Wirejewelry.com Wire Jewelry Pattern for August...
- August 3, 2017
-
 Free Pattern: Stone Twist Wrap by Karen Meador
by Judy Ellis, Wirejewelry.com Wire Jewelry Pattern for July...
- July 31, 2017
-
 Free Pattern: Floating Bead Earrings By Kimberly Newman
by Judy Ellis, Wirejewelry.com Wire Jewelry Pattern for July...
- July 27, 2017
Featured Tools
-
 Get to Know Your Hand Tools – Tube-Cutting Jig By Helen I. Driggs
by Judy Ellis, Wirejewelry.com Wire Jewelry Tip for August...
- August 4, 2017
-
 Wire Jewelry Video: Using Punch Pliers by Judy Freyer Thompson
by Judy Ellis, Wirejewelry.com Wire Jewelry Tip for August...
- August 2, 2017
-
 Wire Jewelry Video: Aligning a Hole Punch by Judy Freyer Thompson
by Judy Ellis, Wirejewelry.com Wire Jewelry Tip for July...
- July 26, 2017
-
 Get to Know Your Hand Tools – Wire Cutters – Helen I. Driggs
by Judy Ellis, Wirejewelry.com Wire Jewelry Tip for July...
- July 25, 2017