


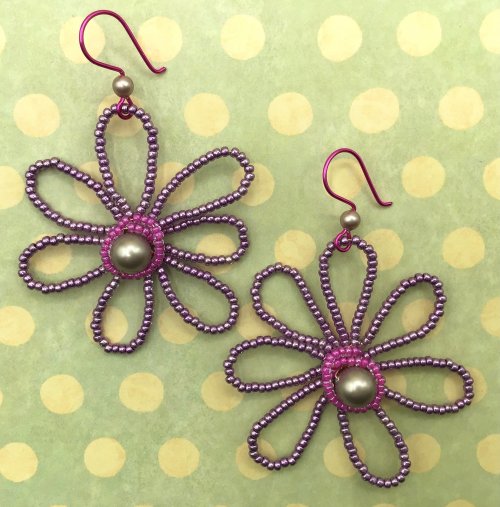


Coiled Wire Earrings
- Category: Contemporary
- Technique(s): Coiling
- Skill Level: Beginner
This tutorial shows an easy way to create a frame and decorative elements around a bead. Using minimal materials, you can produce this style to make earrings and a matching pendant. (Any sized bead and crystals will work for this design, by adapting the wire lengths to accommodate your chosen beads.)
Materials

20 Gauge Half Round Half Hard Argentium .940 Silver Wire
H19-20HRH
- Lesson Quantity: 1.00 pieces
- Purchase Quantity: 1.00 1FT
- Price: $2.00
- Gold Club Price: $1.50

26 Gauge Round Dead Soft .925 Sterling Silver Wire
H8-26D
- Lesson Quantity: 1.00 pieces
- Purchase Quantity: 1.00 5FT
- Price: $4.08
- Gold Club Price: $3.06

Malachite 6mm Round Beads - 8 Inch Strand
A1-695
- Lesson Quantity: 1.00 pieces
- Purchase Quantity: 1.00 each
- Price: $17.85
- Gold Club Price: $13.39

Rhyolite 6mm Round Beads - 8 Inch Strand
A1-415
- Lesson Quantity: 1.00 pieces
- Purchase Quantity: 1.00 each
- Price: $9.60
- Gold Club Price: $7.20

Sterling Silver Earwires Textured 19mm - Pack of 2
K19-66
- Lesson Quantity: 1.00 pieces
- Purchase Quantity: 1.00 each
- Price: $4.87
- Gold Club Price: $3.65

3mm crystals
- Lesson Quantity: 50.00 pieces
- Purchase Quantity: 50.00 each
Tools

Round Nose Wire Pliers
G2-507
- G2-507
- Lesson Quantity: 1.00 pieces
- Purchase Quantity: 1.00 each
- Price: $32.95
- Gold Club Price: $24.71

Chain Nose Wire Pliers
G2-508
- G2-508
- Lesson Quantity: 1.00 pieces
- Purchase Quantity: 1.00 each
- Price: $32.95
- Gold Club Price: $24.71

C.H.P Milano Italian Flush Cutter, 5 1/2 Inches
PLR-487.00
- PLR-487.00
- Lesson Quantity: 1.00 pieces
- Purchase Quantity: 1.00 each
- Price: $16.97
- Gold Club Price: $12.73
Instructions
Step 1
Take 12" of 20 gauge/0.8mm wire and position the bead on to the wire at approximately 2 3/4" up from the end and bend the longer end sharply as it exits the bead.

Step 2
Bring the wire tightly around the curve of the bead and lock around the wire that is exiting the top of the bead.

Step 3
Continue to curve the wire closely around the bead, positioning it in front of the wire coming out of the drill hole at the bottom of the bead.

Step 4
Wrap around the top vertical wire again to lock into place.

Step 5
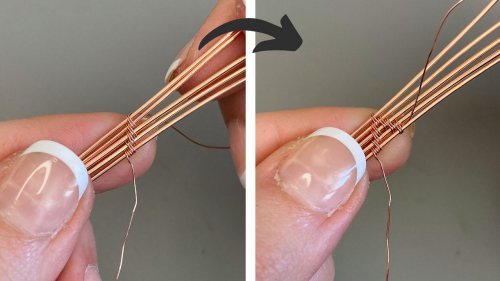
Leaving a 4" tail end of weaving wire before forming the coil, wrap a coil of approximately 2" in length using 26 gauge/ 0.4mm weaving wire directly around the 20 gauge/0.8mm wire that is wrapped around the bead. Do this by making continuous wraps, ensuring the weaving wire is neatly positioned up close to the last wrap.

Step 6
A wire coiling gizmo can be used if preferred.

Step 7
If using the wire coiling tool method, leave a 4" tail of 26 gauge/ 0.4mm wire attached at the end of the coil (to help secure onto the vertical wire on the earring.)

Step 8
If the coil has been created separately using a gizmo, slide the coil onto the 20 gauge/ 0.8mm wire (if not already coiled directly onto the 20 gauge/0.8mm wire.)

Step 9
Use the tail end of weaving wire to anchor the coil on to the vertical wire at the top of the bead to secure.

Step 10
Bring the coiled wire around the bead, positioned behind the inner most bare wire that frames the bead.

Step 11
Wrap the coiled wire around the vertical wire exiting the top of the bead.

Step 12
Add some small, faceted crystals to the 26 gauge/ 0.4mm wire (These can be slid directly onto the 20 gauge/ 0.8mm wire if the drill hole is large enough, but using this 4" tail end of the weaving wire, will enable you to use a larger variety of small crystals.)

Step 13
Position the crystal strung wire around to frame the outside of the coiled wire and use the tail of 26 gauge/ 0.4mm wire to secure in place by wrapping it around the vertical wire before trimming off any excess and tucking in to the frame.

Step 14
Bend the vertical wire exiting the bead a few millimeters up from the coil.

Step 15
Make a wrapped loop to attach an earring hook to (if using a lever back earring finding, attach this through the loop before securing your wrapped loop.)

Step 16
Cut off any excess wire and secure any ends by pressing into the wrapped loop.

Step 17
Repeat steps 1-16 to make your other earring. (Doing so at this stage, will enable you to create mirror symmetry when adding decoration with the excess wire.)

Step 18
Using the remaining 20 gauge/ 0.8mm wire, make swirls and decorative details.

Step 19
When you have achieved symmetry with both of the earnings, cut off any excess wire and secure down any tail ends.

Step 20
You can create this design again to make a matching pendant.

Supply Detail
loading...
Change Metal:
This Pattern requires:
Purchase quantity:
Price: $
Gold Club Price: $
Purchase quantity:
Price: $
Gold Club Price: $

Natalie Patten
Other Patterns by Natalie Patten
 French Hook Ear Wires
 Adjustable Wire Wrapped Ring with Gemstone Bead
 Top Drilled Stone Pendant
 Wire Wrapped Donut Pendant
 Coiled Wrap Bead Earrings
 Gemstone Chip and Wire Cuff Bracelet
 Wire Wrap a Chandelier Crystal
 Beaded Wire Jewelry Set
 Braided Wire Cuff
 Classic Wrap Pumpkin Pendant
 Woven Wire Pendant and Earrings Set
 Beaded Wire Christmas Tree Ornament
 Woven Wire Cross Pendant
 Adjustable Beaded Wire Bracelet
 Beaded Wire Bracelet
 Interlocking Coil Bangle
 Bead and Micro-Crystal Wire Earrings
 Valentine Heart Wire Earrings
 Gemstone and Spacer Bead Bangle
![]()
The premier place for all your jewelry making needs. The best in wire, tools, cabochons, gemstone beads and more. As well as a superior resource for educational support to help build your jewelry making skills and techniques.
Connect With Us

® 2007 - 2024 Wirejewelry.com Powered by ClaimTheWeb Cart