


Echo 8 Link
- Category: Contemporary
- Technique(s): Lashing, Making Loops
- Skill Level: Beginner
While experimenting with the Celtic chain link, I discovered this graceful "looped link" variation. Extremely variable in size, wire and the ability to add further decorate the link, you'll find it fun to 'play' with this interesting variation.
Materials

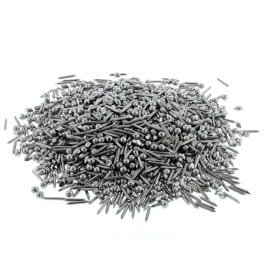
18 Gauge Half Round Dead Soft 1/10 Sterling Silver Filled Wire
H10-18HRD
- Lesson Quantity: 5.00 feet
- Purchase Quantity: 1.00 5FT
- Price: $4.75
- Gold Club Price: $3.56

18 Gauge Half Round Dead Soft .925 Sterling Silver Wire
H8-18HRD
- Lesson Quantity: 5.00 feet
- Purchase Quantity: 1.00 5FT
- Price: $12.82
- Gold Club Price: $9.62

18 Gauge Round Dead Soft Copper Wire
H11-18D
- Lesson Quantity: 5.00 feet
- Purchase Quantity: 1.00 5FT
- Price: $3.53
- Gold Club Price: $2.65
Tools

WireJewelry - Ultimate Wire-Pliers Jewelry Pliers with Case, Set of 5
G15-20
- G15-20
- Lesson Quantity: 1.00 pieces
- Purchase Quantity: 1.00 each
- Price: $170.72
- Gold Club Price: $128.04
Instructions
Step 1
The larger Echo 8 links - about 1-1/4" / 3 cm) - require at least 18g wire. Though 18g is a fairly maneuverable wire, 14-16g can be used if you have strong fingers and are familiar with making bends in thicker wires. (We'll address ways to manipulate heavier wire in this tutorial.) Smaller Echo 8 links can be made with thinner gauge wire.
A necklace, or dangling earrings, are particularly good to display multiple wire gauges in diminishing sized links. Some ideas are included, at the end of the instructions.
A necklace, or dangling earrings, are particularly good to display multiple wire gauges in diminishing sized links. Some ideas are included, at the end of the instructions.
I used 18g copper wire to make the large links. Since it is easier to work with 'one link lengths', begin by cutting a 7" / 18 cm length of wire. Note: This length is only if you wish to make a loop at each end; if you wish to add a bead, before making the loop, cut an additional 1"/10mm for each bead: Ex: Cut 9"/22.5cm to add two beads - one before each loop. Shorter links in smaller gauge wire will require 1/2" to 1" (15-25cm) less for each step-down in size.

Step 2
Begin by making using your fingers to gracefully curve a loop at a third of the wire's length.

Step 3
In order to get the interesting 'echo' effect, you'll need to manipulate the wire a little, gently forming it into a curve - in anticipation of the next step. The long end of the wire has been gently curved in this photo.

Step 4
It is easiest to use a mandrel, pencil, tool handle or other device to make the initial circles for the 'figure 8'. Create the circle at approximately the 1/3 'position' of the wire, short end on the left, long end on the right.
The circle has been made.


Step 5
When working with heavy wire, begin with a shape that is easy to form - like the circle. The Echo 8 link is actually two slightly flattened circles that form 'oval' shapes. In preparation to make the next circle, shape the wire as shown. You can use a larger mandrel, thread spool, prescription bottom, or other larger circular or slightly oval device to begin these curves.
Another view - ready to make second circle after replacing mandrel in new curve. 'Pre-curving' the wire makes it ready to make a circle - but also prepares the wire for the modeling needed to make the 'echo'.


Step 6
The second circle has been roughly made, and the short end of the wire inserted through the first circle. Notice that it is inserted from under the bottom of the circle and up over the top.

Step 7
You'll probably need pliers to gently pull the wire through the first circle. (Masking tape placed over the 'working' part of the jaws will prevent scratching the wire.) Note that the first circle is still round - and will need to be compressed gently to flatten it a bit to make it more oval.

Step 8
Begin shaping the link: Curve the long end to echo the bottom, and bring it upward. Note that the 'circle', on the left, needs to be compressed to an oval shape. Use your fingers or a nylon-jaw plier, in 'tiny steps'.

Step 9
Both of the former circles have been gently 'flattened' to be more oval in shape. Use your fingers, or nylon-jawed tool, to manipulate the wire to form gentle "S" shapes where the wires cross in the center. You can adjust the depth of the 'echo' to your liking, but it should remain fairly obvious.
After the "S" curves have been adjusted, use chain nose pliers to bend the wire ends 'flat' with the top of the link. We'll use two more maneuvers to create a flat plane for the connecting loops on the two sides.


Step 10
(Upside down view): Wire ends bent down. The wire ends are then bent down. This makes one half of the 'flattening' bends.
The wire ends are then bent to flatten them once again - creating a 'jog' in the wire. The ends are now on the same plane as the link.


Step 11
For 18g wire, you'll need to trim the ends to about 5/8" / 18mm. This gives you enough length to create an average connecting loop. You may wish to double-check the amount of wire you use for loops, in case your loop sizes differ, and allow a little more end length.
To make this a true connecting link, make one loop 'horizontal', and the other loop 'vertical'. Before making the connecting loops: Position the links so each is 'facing upward', and the curves match. This assures that links will be symmetrical. You can then attach 'link to link'. You can also make identical loops on each end, and use jump rings to fasten the links together. This offers an additional way to add an Echo 8 link alternating with a bead link. Additionally, you can place a bead between the Echo 8 link and the connecting loop, at each end. Note the wire cutting lengths, above, for this option.


Step 12
The larger loops are ideal 'frames' for further decoration, as shown above. You can add beads - either simply strung and fastened at each end, or with a wire 'overwrap' for additional interest. Of course, the 'figure 8' weave is an ideal choice for the Echo 8 link!
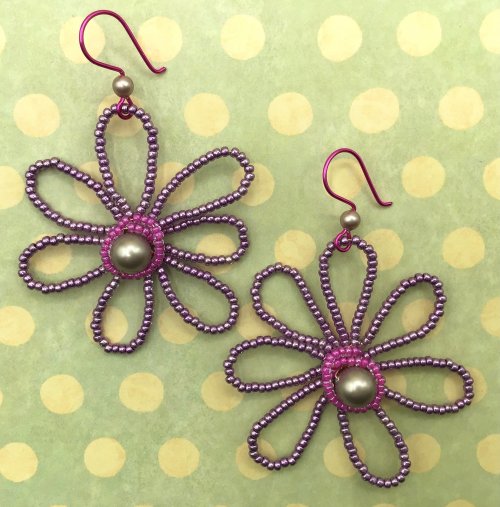
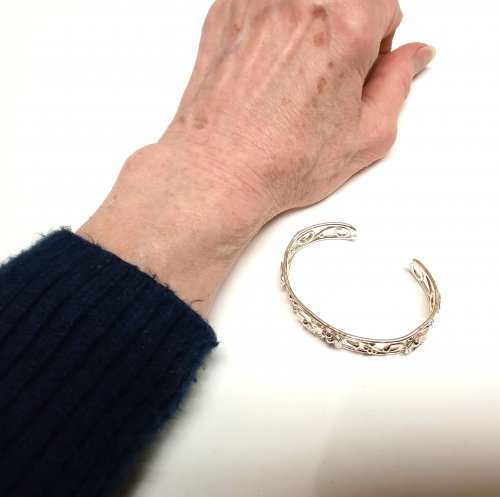
Turn the link vertically to make earrings - adding a dangling bead in each open oval space, or further embellishing it with weaving and a single bead dangle at the bottom. Use 14-16g wire to create larger versions for a pendant - either vertically or horizontally positioned.
As you can see, this new link design will open doors to endless design possibilities. We'll look forward to seeing your creative ideas!
Create With Your Heart - Craft With Your Hands
Linda Gale
Suggestions for articles appreciated.
Linda Gale
Suggestions for articles appreciated.

Supply Detail
loading...
Change Metal:
This Pattern requires:
Purchase quantity:
Price: $
Gold Club Price: $
Purchase quantity:
Price: $
Gold Club Price: $
Linda Gale
Other Patterns by Linda Gale
 Wire Weave Combination - Framed Netting
![]()
The premier place for all your jewelry making needs. The best in wire, tools, cabochons, gemstone beads and more. As well as a superior resource for educational support to help build your jewelry making skills and techniques.
Connect With Us

® 2007 - 2024 Wirejewelry.com Powered by ClaimTheWeb Cart