


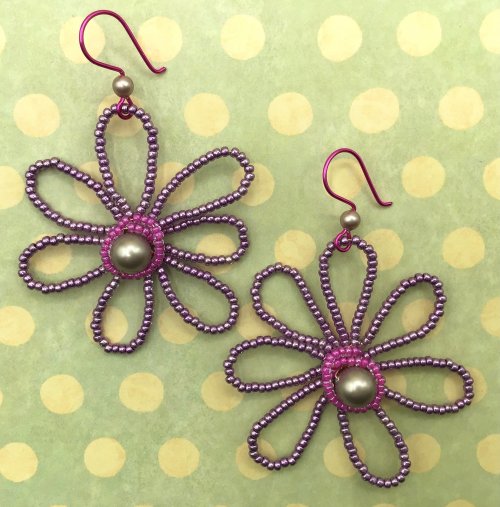


Embellished Artisan Ear Wires
- Category: Findings
- Technique(s): Lashing, Making Findings
- Skill Level: Beginner
Jewelry findings can be as ornately decorated as the jewelry they are attached to, so that they enhance the finished item.
These embellished Artisan ear wires can be coordinated to match your earrings, or left as plain wire, without the beads. These ear wires measure 1 1/4" tall and 7/8" wide with the beads)
These embellished Artisan ear wires can be coordinated to match your earrings, or left as plain wire, without the beads. These ear wires measure 1 1/4" tall and 7/8" wide with the beads)
Materials

28 Gauge Round Dead Soft Copper Wire
H11-28D
- Lesson Quantity: 40.00 inches
- Purchase Quantity: 1.00 5FT
- Price: $0.77
- Gold Club Price: $0.57

20 Gauge Round Half Hard Copper Wire
H11-20H
- Lesson Quantity: 7.00 inches
- Purchase Quantity: 1.00 1FT
- Price: $0.50
- Gold Club Price: $0.37

3mm rondell gemstone beads
- Lesson Quantity: 10.00 pieces
- Purchase Quantity: 1.00 each
Tools

Round Nose Wire Pliers
G2-507
- G2-507
- Lesson Quantity: 1.00 pieces
- Purchase Quantity: 1.00 each
- Price: $32.95
- Gold Club Price: $24.71

Flat Nose Wire Pliers
G2-506
- G2-506
- Lesson Quantity: 1.00 pieces
- Purchase Quantity: 1.00 each
- Price: $32.95
- Gold Club Price: $24.71

Chain Nose Wire Pliers
G2-508
- G2-508
- Lesson Quantity: 1.00 pieces
- Purchase Quantity: 1.00 each
- Price: $32.95
- Gold Club Price: $24.71

Economy Nylon Jaw Pliers
G2-25
- G2-25
- Lesson Quantity: 1.00 pieces
- Purchase Quantity: 1.00 each
- Price: $11.97
- Gold Club Price: $8.98

C.H.P Milano Angled Flush Cutter, 5-1/4 Inches
PLR-489.00
- PLR-489.00
- Lesson Quantity: 1.00 pieces
- Purchase Quantity: 1.00 each
- Price: $21.95
- Gold Club Price: $16.46

Wire Rounder Set, 3 pieces
G14-20
- G14-20
- Lesson Quantity: 1.00 pieces
- Purchase Quantity: 1.00 each
- Price: $13.95
- Gold Club Price: $10.46
Instructions
Step 1:
Prepare the wire
Cut 2 pieces of 20 gauge wire 3 1/2” long each. Straighten the wire by holding one end in the chain nose pliers and pulling through the jaws of the nylon jaw pliers a couple of times. Mark the center of both pieces of wire with a marker pen.

Step 2:
Shape the wire
Carefully shape the center of the wire around the end of the ring mandrel, forming a complete circle.
Repeat on the other piece of wire.


Step 3:
Bend the wire
Grasp the wire at the pen mark with the flat nose pliers and bend by 80° so that the wire ends cross over.
Repeat on the other piece so they match.


Step 4:
Finish shaping
Grasp one of the wires, just after the bend, with the nylon jaw pliers and gently squeeze to straighten that section of wire.
Repeat on the other side of the bend and on each end of wire. Notice how the shape changes. Repeat on the other ear wire.


Step 5:
Form a loop
Grasp one end of the wire with the round nose pliers and form a loop outwards, by turning the pliers. Guide the wire around the jaw with your thumb until it touches itself. Repeat on the second wire.

Step 6:
Make the loop round
Notice how the loop is currently egg shaped. In order to make it round, hold the flat edge of the flush cutters at a 90° angle to the straight wire coming from the loop and snip the end off.

Step 7
Notice how this gives you an angled end. Use round nose pliers to close the loop again. Repeat on the other wire.


Step 8:
Bend the other end
Grasp the straight end of the wire with the flat nose pliers and bend upwards by 70°. Repeat on the other ear wire.


Step 9:
File the ends
As the end of the wire needs to pass through he pierced ear, you have to ensure that it is smooth. Carefully file the end of the wire (or use a bur cup if you have one) to remove any sharp edges. Repeat on the second wire.

Step 10:
Attach a new wire
Check that the 2 ear wires are a matched pair, by holding them against each other to compare and adjust as necessary. Now the ear wires are made, they are ready to embellish.
Cut a 20” length of 28 gauge wire and attach to one of the earwires, just above the loop, by coiling three times, leaving a 1” tail (to hold onto)
Cut a 20” length of 28 gauge wire and attach to one of the earwires, just above the loop, by coiling three times, leaving a 1” tail (to hold onto)
Pro Tip: To keep the coils straight and tight, keep the length of 28 gauge wire at a 90° angle to the frame wire.

Step 11:
Attach the beads
Thread 5 x 2-3mm roundel beads onto the 28-gauge wire.
Hold the beads in position against the frame wire with your thumb and forefinger of your less dominant hand and coil the 28 gauge around the ear wire 3 times to secure. Notice how the beads are still able to move around the frame wire.


Step 12:
Begin to wrap the beads
To secure the beads tightly against the frame and also add extra detail the 28 gauge wire is wrapped around each bead and the frame. Begin the wrapping by passing the 28 gauge wire under the frame wire and between the first and second beads.
Pull tightly so that the edge of the bead sits against the ear wire.
Continue wrapping between each bead and round the frame until you have secured all 5 beads Coil the wire round the frame once to secure.


Step 13:
Bring the wire back
To complete the first layer of the wrap, bring the 28 gauge wire under the frame wire and between the fourth and fifth beads. Pull tightly so that the wire locks into place.
Continue until you have wrapped all 5 beads. Check all beads are straight and adjust if necessary.
Pro Tip: Hold the beads in line with your thumb and forefinger of your less dominant hand while wrapping, to stop the beads turning on the frame wire.


Step 14:
Create the second wrap
Pass the 28 gauge wire under the frame wire, positioning it after the first cross of the wrapping underneath the frame. Notice how this positioning forces the wire to sit over the side of the bead.
Wrap all 5 beads in this way.
Bring the 28 gauge wire back in the same way, completing the second layer. Coil once to secure. Notice the pattern that you have created already.


Step 15:
Final wrap
Turn the ear wire over, notice how the pattern is not as defined on this side. The final layer of wrapping rectifies this.
Pass the 28 gauge wire between the first and second bead and around the frame, before the existing wraps, pulling the wire over the side of the bead.
Complete all 5 beads, taking the wire back to the top of the wrapped beads. Coil 3 times to secure.


Step 16:
Trim the wires
Trim the wire ends so that they are on the inside of the frame and tuck in by carefully grasping the frame with the chain nose pliers and using a twisting motion, in the same direction as the coils, flattening the 28 gauge wire against the frame, securing it in place.
Repeat on the other ear wire. Close the earwires
Now all the wrapping work is complete, close the bend of the earwires to 80°.
They are now ready to use!
Now all the wrapping work is complete, close the bend of the earwires to 80°.
They are now ready to use!
I hope you enjoyed this tutorial.
For comments or questions, please go to abbyhook.co.uk
Please do not distribute, lend or copy.
Do not mass produce.
Please give credit to the Teacher. Use and view of this content constitutes an agreement to Abby Hook’s Terms of Use.
Copyrights 2017 Abby Hook
For comments or questions, please go to abbyhook.co.uk
Please do not distribute, lend or copy.
Do not mass produce.
Please give credit to the Teacher. Use and view of this content constitutes an agreement to Abby Hook’s Terms of Use.
Copyrights 2017 Abby Hook


Supply Detail
loading...
Change Metal:
This Pattern requires:
Purchase quantity:
Price: $
Gold Club Price: $
Purchase quantity:
Price: $
Gold Club Price: $

Abby Hook
Other Patterns by Abby Hook
 Wire Wrapped Bail for Top-drilled Stones
 Wire Wrapped Bail for Stone Donuts
 Figure 8 Chain
 Seed of Change Pendant
 testdenise
 Wire-wrapped Bead Link Bracelet
 Heart Frame Bracelet
 Embellished Hook Clasp
 Embellished Heart Earrings
 Coiled T-bar and Toggle Clasp
 Simply Elegant Pendant
 Lavender Lariat Necklace
 Brooch Pin
 Woven Wire Lotus Flower Pendant
 Coiled Ear Wires
 Wire Wrapped Briolette Pendant
 Simple T-bar and Toggle Clasp
 Cirrus Pendant
 Spiral Wire End Caps
 Mermaid's Teardrop Necklace
 Spiral Bead Cage
 Spiral Bead Charm
 Quick and Easy Loop Earrings
 Squares Bracelet
 Fuchsia Bud Earrings
![]()
The premier place for all your jewelry making needs. The best in wire, tools, cabochons, gemstone beads and more. As well as a superior resource for educational support to help build your jewelry making skills and techniques.
Connect With Us

® 2007 - 2024 Wirejewelry.com Powered by ClaimTheWeb Cart