
Three Petal Bud and Layered Embellishment
- Category: Metalwork
- Technique(s): Cutting, Butane Torch Techniques
- Skill Level: Intermediate
Designing easy-to-make flowers has been on my agenda for the end of the year. When the 2024 Pantone Color of the Year, Peach Fuzz, was announced, I started rummaging through my stash to see if I had anything that was close in color. The only thing I could find was an inexpensive rock pendant which could not be bezel set. While grinding one side down so it would sit flat (I have no lapidary equipment but a coarse grit silicone polisher did the trick), I was thinking about how I could use it, and thinking about spring because it was so cold outside. One thing led to another, and my mind landed on flowers. Although the real flowers have only five petals, this flower is a bit reminiscent of peach blossoms, as well as prairie roses, which grow wild around our home.
Materials

22 Gauge Dead Soft Argentium Silver Sheet - 6 Inches
H19-22SM6
- Lesson Quantity: 1.00 pieces
- Purchase Quantity: 1.00 1 Inch
- Price: $61.68
- Gold Club Price: $46.26

24 Gauge Dead Soft Argentium Silver Sheet - 6 Inches
H19-24SM6
- Lesson Quantity: 1.00 pieces
- Purchase Quantity: 1.00 1 Inch
- Price: $48.95
- Gold Club Price: $36.71

20 Gauge Round Half Hard Argentium .940 Silver Wire
H19-20H
- Lesson Quantity: 1.00 pieces
- Purchase Quantity: 1.00 1FT
- Price: $4.22
- Gold Club Price: $3.17

Silver Filled Bright Beads Seamless (H: 1.0mm) 4mm - Pack of 25
S9-11
- Lesson Quantity: 1.00 pieces
- Purchase Quantity: 1.00 each
- Price: $3.28
- Gold Club Price: $2.46

Silver Filled Bright Beads Seamless (H: 0.9mm) 3mm - Pack of 50
S9-10
- Lesson Quantity: 1.00 pieces
- Purchase Quantity: 1.00 each
- Price: $4.14
- Gold Club Price: $3.11

Silver Filled Bright Beads Seamless (H: 1.5mm) 5mm - Pack of 25
S9-12
- Lesson Quantity: 1.00 pieces
- Purchase Quantity: 1.00 each
- Price: $5.34
- Gold Club Price: $4.01
Tools

Basic Sawing Kit
G15-7
- G15-7
- Lesson Quantity: 1.00 pieces
- Purchase Quantity: 1.00 each
- Price: $34.95
- Gold Club Price: $26.21

Steel and Rubber Bench Block 4x4 Inches
G17-44
- G17-44
- Lesson Quantity: 1.00 pieces
- Purchase Quantity: 1.00 each
- Price: $29.95
- Gold Club Price: $22.46

Basic Soldering Kit
G15-4
- G15-4
- Lesson Quantity: 1.00 pieces
- Purchase Quantity: 1.00 each
- Price: $58.95
- Gold Club Price: $44.21

Silver Solder Paste Medium SS70 - 1/4 T.O.
SOL-822.15
- SOL-822.15
- Lesson Quantity: 1.00 pieces
- Purchase Quantity: 1.00 each
- Price: $18.95
- Gold Club Price: $14.21

7 Piece Mini TruStrike Hammer Set with Stand
HAM-520.70
- HAM-520.70
- Lesson Quantity: 1.00 pieces
- Purchase Quantity: 1.00 each
- Price: $140.54
- Gold Club Price: $105.40

Small Disc Cutter, 7 Pieces
DAP-400.10
- DAP-400.10
- Lesson Quantity: 1.00 pieces
- Purchase Quantity: 1.00 each
- Price: $46.95
- Gold Club Price: $35.21

awl
- Lesson Quantity: 1.00 pieces
- Purchase Quantity: 1.00 each

French Shears - Curved Shear with Spring
SHR-531.01
- SHR-531.01
- Lesson Quantity: 1.00 pieces
- Purchase Quantity: 1.00 each
- Price: $29.97
- Gold Club Price: $22.48

Single 3rd Hand with Tweezer and Base
HOL-165.00
- HOL-165.00
- Lesson Quantity: 1.00 pieces
- Purchase Quantity: 1.00 each
- Price: $18.97
- Gold Club Price: $14.23
Instructions
Step 1
Read through the tutorial before starting the project. Follow all safety precautions for the space you are working in as well as all safety precautions pertaining to the tools and supplies you will be using to complete the project. Note: If using sterling silver instead of Argentium, flux the pieces before heating to prevent fire scale.
Enlarge or reduce the templates using the ruler as a guide to scale. Print a set of templates. If using a stone in the finished design, set the stone next to the templates to help make a determination as to which would work best with the finished design idea. See Step 41 to see the size of the large flower, medium leaves, and small bud used in the finished pendant in relation to my hand.
Enlarge or reduce the templates using the ruler as a guide to scale. Print a set of templates. If using a stone in the finished design, set the stone next to the templates to help make a determination as to which would work best with the finished design idea. See Step 41 to see the size of the large flower, medium leaves, and small bud used in the finished pendant in relation to my hand.

Step 2
The open flower is constructed with two three petal flower layers. The bud is made with one smaller three petal flower shape and a three-leaf sepal shape. Print paper templates for the two three-petal flower shapes, the number of leaves desired, the bud and bud sepal the desired size for each finished metal flower being made. Cut the desired templates out and glue to 24 gauge sheet metal.
Use a saw to cut out the open flower shapes. It is easier to keep the threading hole centered while cutting if it has been cut first with a 1.5mm hole punch in the center of the small bud flower and 3-leaf sepal sections.
Something to keep in mind: The larger the open flower, the thicker the metal should be, especially if being used on a bracelet or cuff. In that case, larger flowers may be best made with 22 gauge sheet metal. If using 24 gauge metal with a larger flower, there should be many more solder contact points between all the parts and the backing to secure the petals to keep them from inadvertently being snagged and pulled or bent away from the piece.
Pro Tip: The flower layers will be easier to assemble correctly later if an ultra-fine point Sharpie marker is used to label the top and bottom petal shapes in the spots shown.

Step 3
Steps 3 through 12 are instructions for constructing the open flower. Steps 13 through 21 are instructions for constructing the flower bud. Steps 22 through 27 are instructions for constructing the leaves. The remaining steps are general directions for using the parts in a jewelry piece.
Make a variety of small balled wire or scrap sheet bits to use as the flower center. Flower center option: Use a snap set or tube setting for a CZ that works with your design and color choices as a flower center.


Step 4
Place the two flower sections on a bench block. Use 3/8"and 1/4" chisels or line stamps to stamp lines on the petals where indicated on the templates.

Step 5
Use files and sanding pads to refine edges of each piece.
Step 6
Anneal the flower shapes as this will make it easier in the next step to shape the tips of the petals.
Step 7
Use a Mini TruStrike Sharp Designer Hammer to curve the tips and edges of each petal towards the back of each flower shape. The shape and size will not change much.


Step 8
Annealing the petal pieces will make it easier to scratch shading grooves in the flower petals in the next step.
Step 9
Use a scratch awl to scratch lines from the flower center to the outside edge of the petal. Densely cover the surface of both three-petal flower sections.

Step 10
Bend the flower petals up a bit on the bottom three-petal flower shape and a bit more on the top three-petal flower shape. The petals of the top flower shape should NOT touch the bottom flower shape when they are nestled together.
Use a solid ¼" diameter rod to flatten the center area of each Extra-large and Large flower shape and a 3/32" or 1/8" rod on the medium and small flowers-I use aluminum ones, but wooden dowels work very well. When the top flower shape is set on the bottom flower shape, the centers should be flush with each other.
When the flower sections are assembled, the top flower petals should sit between the petals of the lower section. Make any adjustments necessary, making sure the top petals do not touch the lower petals.

Step 11
Working on a soldering surface, place medium paste solder in the center of the lower flower shape. Press the top flower shape into the paste solder, making sure the petals are positioned between the petals of the lower section. Place medium paste solder in the center of the top three-petal flower. Press the desired flower center embellishment into the solder-see Step 3.

Step 12
If making more than one flower at a time, spread them out on a soldering surface. Paste solder bubbles as the flux burns away, making the parts move around. To avoid this, carefully heat around the flower, about a finger width or so away, until the smoke and flames clear. The heat can then be moved over the flower. The solder should flow quickly. Heat around the piece until the solder flows. Immediately remove the heat. Allow the piece to cool naturally.
Step 13
The bud is made with one smaller three-petal flower shape and a three-leaf sepal shape. Use ¼" and 1/8" chisels or line stamps to stamp lines on what will be the outside of the bud petals and what will be the outside of the three-leaf sepal shape where indicated on the templates. Note: Two buds are shown in the process of being made in some of the following photos.

Step 14
Shape the bud petals in the same manner as in Step 7. Use a Mini TruStrike Sharp Designer Hammer to curve the petals toward the stamped side, which will be the outside of the bud.
Step 15
Since both the outside and the inside of the bud are visible, both sides need texture scratching. The bud on the left in the photo shows the outside of the flower bud scratch textured in the same manner as the flower petals in Step 9. The inside of the flower bud, on the right side of the photo, still needs texture scratching.

Step 16
Aneal the shaped flower bud.
Step 17
With the stamped lines of the bud facing down in a small dapping well, press a small dapping punch by hand into the center of the bud to shape it as shown. Be gentle as hammering the dapping punch could destroy the texturing. Repeat the process with the three-leaf sepal.

Step 18
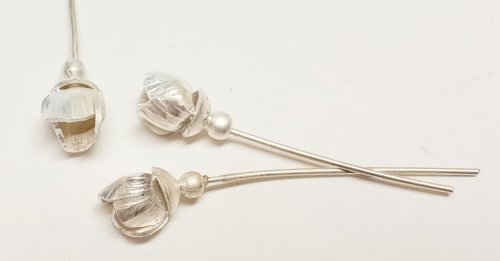
How long a head pin should be is dictated by the design of the piece it will be used in. I made a 3" balled 20 gauge Argentium head pin but ended up cutting quite a bit off-see Step 30-which I then balled and used with the second bud I was making. A balled head pin alone makes a nice bud center. I decided to add a bead to curve and shape the flower petals around. The following round bead sizes can used as bud centers: Small-3mm; Medium-4mm; Large-4 to 5mm.
Slide all the bud sections in order on the head pin. Form the bud around the bead. Shape the sepal tighter if needed.
Slide all the bud sections in order on the head pin. Form the bud around the bead. Shape the sepal tighter if needed.
Step 19
Once all the pieces fit together to your liking, assemble them in order with a bit of medium paste solder between the layers.


Step 20
The bead added to the bud stem after the sepal is not necessary. I thought a bead or a small domed bead disk cap added a nice touch. I used a 3mm bead on the small bud. A tiny bit of medium paste solder is all that will be needed between the bead and sepal.

Step 21
Using a third hand cross lock tweezers, hang the bud assembly above a soldering surface. Heat the bud assembly only until the solder flows. Heating above the bud assembly will melt the stem wire and the weight of the bud will cause it to pull away from and fall off the melted stem. Allow the flower bud and stem to cool before moving it.

Step 22
Draw a line down the middle of each leaf. Use a Mini TruStrike Sharp Designer Hammer to texture each leaf out from the center line.

Step 23
Use a rubber mallet to flatten the textured leaves on a bench block. Cut a length of 20 gauge round wire for each leaf.
Note: I have a stash of different types and sizes of leaves on hand to use when inspiration strikes. Since I do not know how they will be used, they all have long stems, just in case they are need. The wires can be trimmed shorter-Step 29- and the scrap used on replacement leaves in my stash.
Note: I have a stash of different types and sizes of leaves on hand to use when inspiration strikes. Since I do not know how they will be used, they all have long stems, just in case they are need. The wires can be trimmed shorter-Step 29- and the scrap used on replacement leaves in my stash.
Step 24
Working on a soldering surface, place a bit of medium paste solder down the center of each leaf. Press a 20 gauge wire stem into the solder, making sure to let the tip of the wire overhang the tip of the leaf. Heat around the leaf until the solder flows. Allow the pieces to cool naturally.

Step 25
Trim the excess wire from tip of each leaf. File and refine each leaf tip so they are no longer sharp.
Step 26
Grasp a leaf along the midrib with a soft jaw pliers. Press the opposite side of the leaf on a bench block. Repeat the process with the other side to shape the leaf.

Step 27
Optional: Grasp each end of the leaf shape with soft jaw pliers and twist to give the leaf a more interesting shape.
Step 28
Pickle, and then neutralize the pieces in baking soda water. Rinse, dry, and refine all the pieces using files and sanding pads.
Step 29
Tumble the pieces for several hours. Rinse and dry them before continuing to the design process.
Step 30
Start designing with the parts. Once the general shape of the piece is decided upon, use a pencil to trace an outline on paper just outside the edge of all the parts. Trim excess wire from the bud and leaves until they fit where desired. Assemble the pieces again and make any adjustments in the outline.


Step 31
Use the paper outline as a guide to cut a sheet metal backing. Texture the back side of the backing, if desired.
Step 32
Since the bail for this pendant was going on the back, easy paste solder would be used there. Because of that, I did not want to use it on the front of the piece. It does work to use the same flow temperature solder in two steps, one right after another, so medium paste solder was used to assemble all the pieces on the backing. Note: The size of this pendant/parts was on the cusp of being too large to get the solder to flow using a Handy Flame torch head on a butane canister. You may find it easier to work with the Medium or Small flower.

Step 33
Once all the pieces are positioned, place the unit on a soldering surface. Heat around the piece until the solder flows. Allow the piece to cool naturally.
Step 34
Trim away excess backing metal.
Step 35
To simulate petals on the backing, use a scratch awl to drag lines into the backing where it shows underneath any flower petals.

Step 36
File and refine the edges.
Step 37
For this pendant, the back was cleaned before the bail sections were added using easy paste solder. The piece was nestled, back side facing up, in pumice and the bail and embellishments soldered in place.

Step 38
Pickle and then neutralize the piece in baking soda water.
Step 39
Tumble the piece for several hours.
Step 40
Patina, rinse, and dry the assembly.
Step 41
It is not often that I don't throw a piece back in the tumbler after removing excess patina. However, with the stone having more matte finish, I found I really liked the brushed finish of the metal after using 200 grit sanding pads on the parts. The stone was set in the bezel and the lower flower petal was pressed over the top of the stone.








 Beaded Briolette Pendant
 Snail Trail Spiral Earrings
 Heart Link Bracelet and Earrings
 Crazy Hoop Earrings
 Double Delight Jade Bracelet
 Swagged Pearl Pendant
 Heart Earrings with Drops
 Scarab Bracelet
 Birthstone Heart Pendant
 Pearl of the Sea Woven Pendant
 Bead Charm
 Coiled Rosette Link
 Wire Jewelry Component and Swan Hook
 Leaf Bail
  Component Templates with Heart Earrings and Pendant
 Ring Pendant
 Calla Lily Earrings
 Birdhouse Pendant
 Clamshell Earrings and Pendant
 Bracelet Component
 Teardrop Earrings and Pendant
 Tab Style Pendant
 Coiled End Caps
 Freeform Pendant
 French Hook Ear Wires
 Necklace Component
 Triangle Shield Earrings, Pendant and Bail
 How to Make a Wire Coil and Bead
 Egyptian Coil Bracelet
 Focal Bead Egyptian Coiled Bracelet
 Sweetheart Round Cabochon Pendant
 Making Cobblestone Cabochons
 Cupcake Wrapper Earrings
 How to Make Metal Washers
 Baseball Skin Keychain
 Pat's Silver Domed Earrings
 Blaze Your Own Path Pendant
 Semi Snap-on Bail
 Interlocking Faux Twist Wire Bracelet
 Fold Formed Cuff With Faux Roman Glass or Coin Cabochon
 Steampunk Style Leaf Earrings
 Stamped Saucer Beads
 Kat's Wire Hoop Earrings
 Simple Bail on a Coin Pendant
 Wire Bangles
 Rolling Mill - or not - Cuff Bracelet
 Jen's Chain
 Making Neckwires
 Silver Scrap Wire Focals to Embellish
 Splash Ring
 Cobblestone Cab Earrings
 Multi Gemstone Necklace
 Southwest Style Pendant
 Bezels Using Square Wire
 Mixed Metal Sampler Bracelet 1
 Mixed Metal Sampler Bracelet 2
 Mixed Metal Sampler Bracelet 3
 Mixed Metal Sampler Bracelet 4 - Words Matter
 Mixed Metal Sampler Bracelet 5 - River Walk
  Mixed Metal Sampler Bracelet 6 - A Little Bling
 Mixed Metal Sampler Bracelets Series PUTTING IT ALL TOGETHER
  Mixed Metal Sampler Bracelet 7 - Steampunk Space Oddity
 Mixed Metal Sampler Bracelet 8 - Fun Shapes
 Jump Ring Fringe Bracelet
 Easy Artisan Earrings
 Making Chain with Wubbers and Wire
 Heirloom Buttons and Beads Bracelet
  Tiny Silver Charms part 1
 Argentium Silver Scrap Chain
 Sterling Lake Stone Pendant with Twisted Wire
 Smashing Drop Earrings
 Argentium Silver Scrap Nugget Cuff
 Finish Them Your Way Earrings
 Paddle Fringe Earrings
 Seed Bead Earrings
 Bracelet Links 1, 2,3
 Stamped Saucer Beads
 Chaos Scrap Wrap Jewelry
 Maple Leaf Earrings
 Child's Bracelet That Grows with Them
 Mike's Surpirise Claire's Ripple Pendant
 Angel Ornament
  Diamonds, Emeralds, and Sapphires, Oh My.
  Treasure Bezel Cups
 Three Leaves Earrings
 Silver and Gold Earrings
 Make a Hidden Bail
 Wire Links 4, 5, 6
 Wire Links 7, 8, 9, and 10
 Double Loop Ear Wires
 Balled and Paddled Head Pins
 Textured Stacked Rings
 Cord and Bead Earrings
 Bali Style Adjustable Closures
 Organic Fused Silver Dust Earrings
 Mobius Rings
 Dainty Bead and Wire Bangle with Hook Closure
 Seed Bead and Nugget Necklace
 Love Locks Heart Charm
 Traditional Southwest Style Hook Closures
  Negative Space Earrings
 Jumbled Lacy Chain
 Easy Beaded Post Hoop Earrings
 Rustic Silver Links
 Make a Soldered Paperclip Chain
 Make a Fused Paperclip Chain
 Make Woven Metal Strips to Use in Your Designs
 Leaf Wrap Metal Rings version 1
 Leaf Wrap Metal Rings version 2
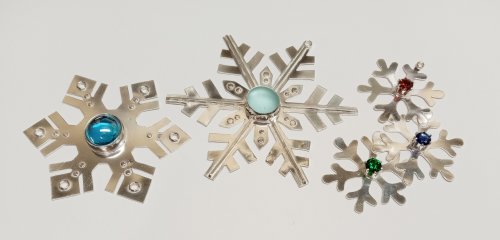 Snowflake Ornaments
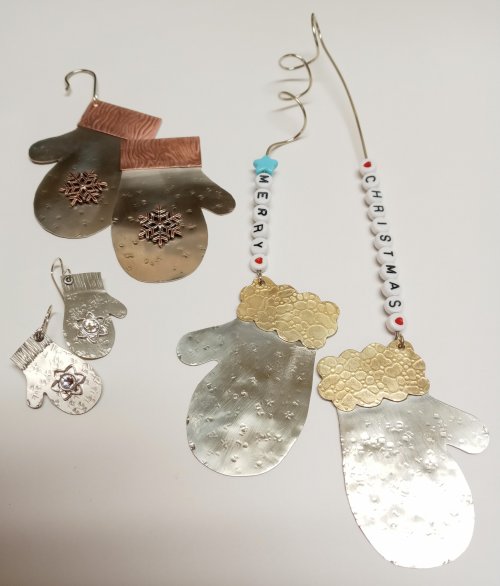 Mitten Ornament
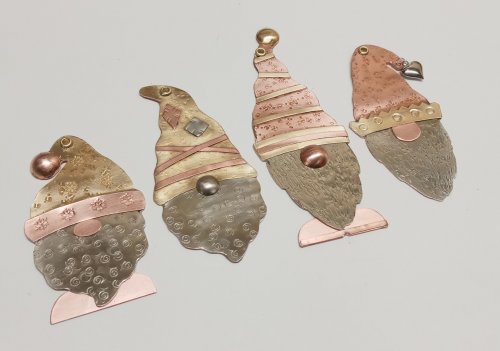 Gnome Ornaments
 A Partridge in a Pear Tree Earrings
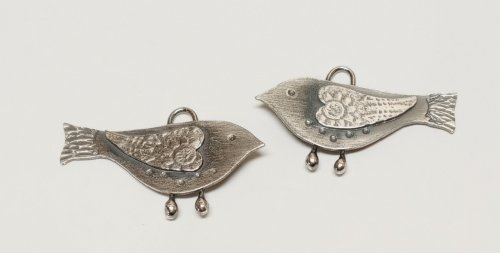 Two Turtle Doves Earrings
 Three French Hens Earrings
 Four Calling Birds Earrings
 Five Golden Rings Earrings
 Six Geese a Layin' Earrings
 Seven Swans a Swimming Earrings
 Eight Maids a Milking earrings
 Nine Ladies Dancing Earrings
 Ten Lords a Leaping Earrings
 Eleven Pipers Piping Earrings
 Twelve Drummers Drumming Earrings
 Make Your Own Bracelet Button Clasps
 Little Saucer Bells
 Doodads - Fun Findings
 No Measure Hearts, Any Size, Any Gauge
  Cascading Drops Earrings
 WIre Basics - Spiral Charms
 Wire Basics - Wrapped Loops and Links
 Wire Basics - Simple Swan Hook
 Wire Crocheted Necklace
 Wire Basics - Wire Garage Door Spring Link
 Easy Post Hoop Earrings
 Double Wrap Wire Bangle Bracelet
 Organic Wire Pendant
 Coiled, Beaded Slide
 Cone and Chain Earrings
 Embellished Sterling Cones
 Classic Wire Wrap Bezelled Pendant
 Wire Wrap a Coin
 Viking Knit
 Viking Knit Bracelet
 Coiled Wire End Caps
 Bead-Wrapped Hoop Earrings
 Copper Feather Earrings
 Soldering a Dome to a Backplate
  Wire Heart Pendant with Gemstone Drop
 Make Basic Wire Shapes for Jewelry
 Make Simple Wire Slide Bails
 Coiled Bead and Twisted Wire Bracelet
 Wire Triangle Link
 Bali Style Focal Toggle
 Silver Nuggets
 Fun Shapes Fish Hook Earrings
 After the Rain Bracelets
 Dangling Drop Earrings
 Dangling Chain Sticks
 Wire Heart Pendant with Gemstone Drop
  Tropical Leaf Earrings
 Basic Bezel Wire Tutorial
 Dog Tag Style Necklace
 Lacy Washers
 8-Strand Kumihimo
 Closed Loop Ear Wires
 Simple Strip Bails from Scratch
 Anti-tarnish Silver Cloth Bags
 Cotter Pin Style Bail
 Holiday Woodland Fairy Ornament
 Happy Holly Days Wreath Ornament
 Happy Holly Days Leaves and Berries
 Happy Holly Days Bells Ornament
  Art Deco Wire Wrapped Pendant
 Twisted Wire Jump Rings
 Two-tone Beaded Bangle
 Sweetheart Pendant
 Waves on the Beach Earrings
 Any Size Wire Hearts - Any Size, Any Gauge
 Just in Case Heart Pendant
 Small Flower Embellishment
 Making Tiny Dapped Metal Leaves
 Spinner Fidget Bangles
 Small Flower Bud Embellishment
 Creating a Flower Stem
 Stamped Tube Beads
 Water Cast Scrap Cross
 Sugared Grapes Pendant
 Gemstone Chains Reimagined
