


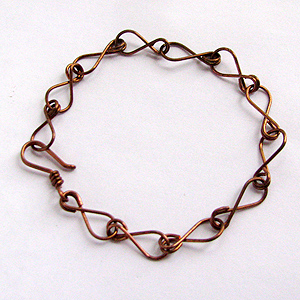
Eight-Chain Bracelet
Designed by Albina Manning © 2012
Skill Level: Beginner/Intermediate
Technique: Using 6-step barrel pliers, forming soft wire
This fun chain can be used to make bracelets, neck chains, and also to link beaded components together. Hammer the wide part of the links for a different look! Enjoy working off the coil or spool in this relaxing design.
Materials
- 18-gauge round dead soft wire.
Note: You will be working off the coil, so the amount needed varies on bracelet length. Plan on using about 3" of wire per inch of bracelet, and 5" for the clasp.
Tools
Instructions
- Working off the coil, straighten a length of 18-gauge wire. Using the second step of the 6-step barrel pliers, make a P-loop on the wire end.
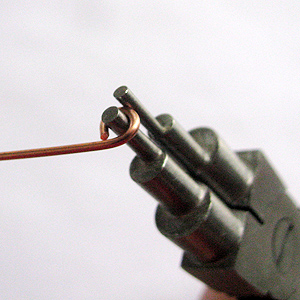

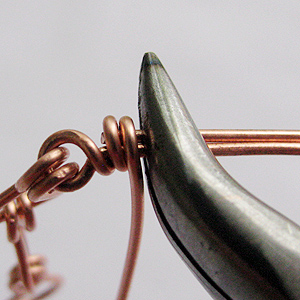
- Place the widest part of round nose pliers 2-3mm away from the loop as shown.
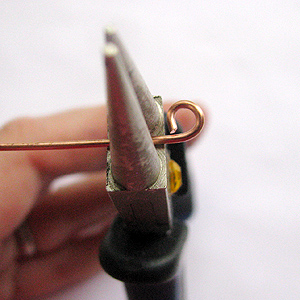
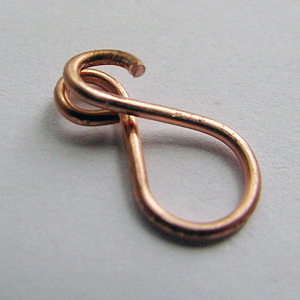
- Bend the wire end around the widest jaw of round nose pliers, so the wire looks like a figure-8 and the wire end is positioned above the little loop.
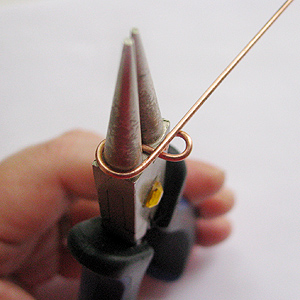
- Place the second step of the barrel pliers into the little loop so the wire end is between the first and the second barrels as shown.
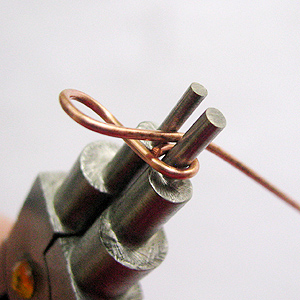
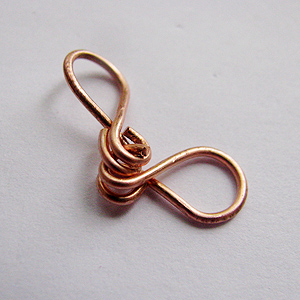
- Wrap the wire around the second barrel. Cut the wire end. Your "eight" has a double loop. Make the second link in the same manner.

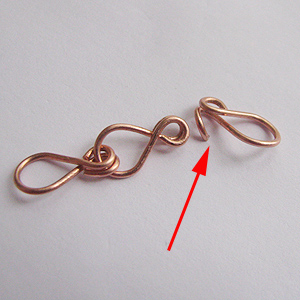
- Open one of the loops (like you would open a jump ring or an earwire's loop) of the second link.
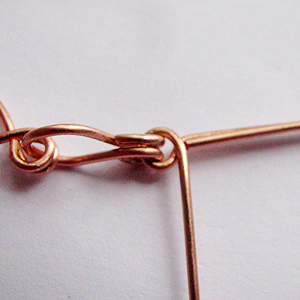
- Pass an open link through the double loop of the first link, then continue sliding the link.

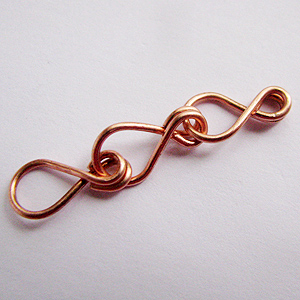
- Make the third link, then open one loop. Place the double loops towards each other as shown. Pass the open loop through both little loops of the chain. Slide the link through, and close the loop. Continue creating links and joining them to the chain in the same manner.

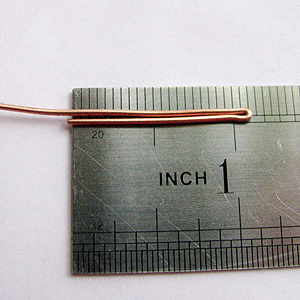
- Making the Clasp. Cut and straighten 5" of 18-gauge wire. Using chain nose pliers, fold wire so one end is 1 1/8" long (28mm).
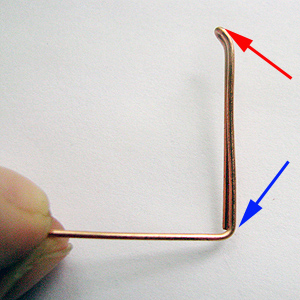
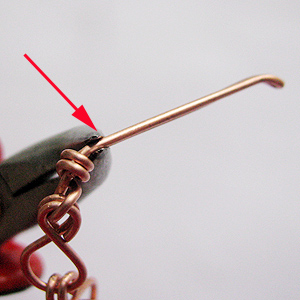
- Grip the very tip of folded end of the wire with chain nose pliers, and bend it slightly at about a 30° angle (red arrow). Grip the two parallel wires with chain nose pliers by the short end of the wire and bend the long tail at about 90° (blue arrow).
- Using round nose pliers, make a small loop.
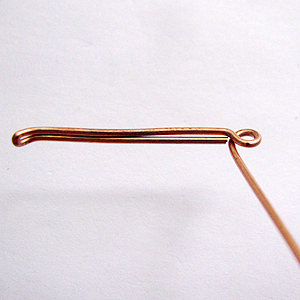
- Slide the last link of the chain with double loops onto the wire end and move it inside the clasp loop. You may want to open slightly the loop for easier sliding.
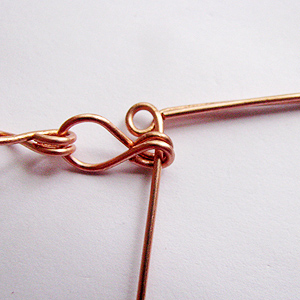
- Start wrapping two parallel wires with the end of the wire. Make about 2-3 tight wraps. Cut off the wire tail.
- Grip the two parallel wires close to the wrapping with the chain nose pliers. Bend slightly, about 30° (red arrow).
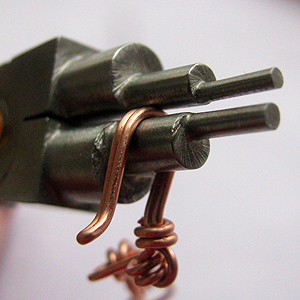
- Bend the parallel wires around the fourth barrel of pliers to complete the clasp.
Your bracelet is ready to wear!
You can add a liver of sulfur patina if you like! Click here to learn how to patina your piece.
 Free Wire Jewelry Patterns
Did you find this pattern through a link from a friend? This Free Wire Jewelry Pattern is just one of dozens of free wire jewelry patterns we send via email. Get patterns like this one straight to your inbox - click here!
![]()
The premier place for all your jewelry making needs. The best in wire, tools, cabochons, gemstone beads and more. As well as a superior resource for educational support to help build your jewelry making skills and techniques.
Connect With Us

® 2007 - 2024 Wirejewelry.com Powered by ClaimTheWeb Cart