


Wire Sculpted Climbing Earrings
Designed by Janne Etz © 2009
Skill Level: Beginner/All
Technique: Round wire
Enter the new rage of wire sculpted earrings. This relatively new method of making earrings that climb up the ear with wire is HOTTER than ever. Quick to make, just a little wire, a few beads, and you're in business.
Materials
- 21-gauge round half hard wire, two 4" pieces
- 2 4mm gemstone beads
- 2 6mm gemstone beads
- 8 3mm metal beads
Tools
Instructions
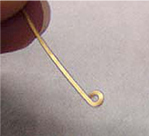
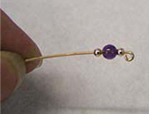
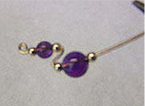
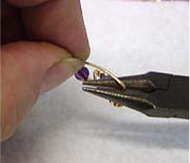
- Make a tiny loop at the end of one 4" length of wire.

- Slide on one 3mm metal bead, then one 4mm gemstone bead, then another 3mm metal bead.
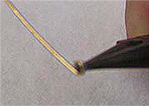
- With chain nose pliers and thumbnail, bend the wire directly beneath the last 3mm bead, back towards the beads.
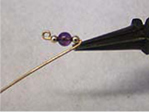
- Move the chain nose pliers up from the bend about 1/8" and bend back down.
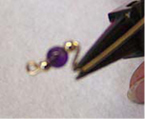
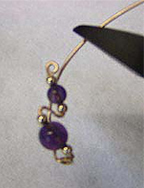
- Slide on another 3mm metal bead, then one 6mm gemstone bead, then another 3mm metal bead.
- Place the very tip of your round nose pliers directly under the last 3mm bead and wrap the wire around twice, very small and tight.
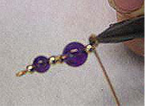
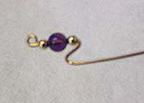
- After the second coil around, without moving the pliers, bend the wire straight out away (perpendicular) from the beads.

- Grab the wire that is now sticking out perpendicular, with your pliers directly up against the beads, and bend the wire up -- now parallel to the beads.
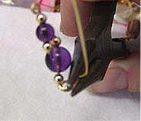
- With one smooth movement of your thumb and thumbnail, curve the wire forward to follow the curve of the beads.
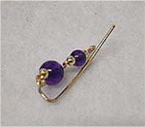
- Trim the wire approximately 1/4" above the beads. (You won't need to trim it so far above the beads on a longer ear pin design.) File the end of the wire.
- The back wire should be far enough away from the beads at the base of the ear pin for it to fit comfortably in the customer's ear. However, the wire should touch or cross the design at the top -- this tension is what holds the ear pin up.
Tip: Always explain to your customer how to "recross" the wires so they can adjust the ear pins themselves if they happen to lose their tesion through normal manipulation of putting them on and taking them off.
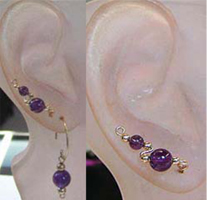
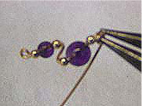
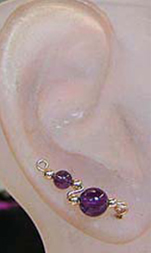
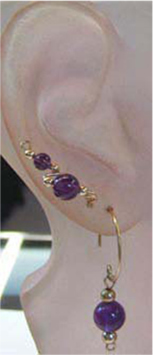
- I like this particular design because it gives the customer that multiple-perced look if they only have one hole in their ear (below, top), or it can be worn as an accent in a second hole (below, bottom).
- You can obviously make this design longer, or embellish it with kinks or curls -- whatever your imagination can think of! I might point out that the reason for the "double-loop" at the bottom of the design is that it takes some of the pressure off when the customer repeatedly "pulls" on the back wire to put the ear pin on. I've found that if you just bend the wire directly over and up, it may eventually break.
 Free Wire Jewelry Patterns
Did you find this pattern through a link from a friend? This Free Wire Jewelry Pattern is just one of dozens of free wire jewelry patterns we send via email. Get patterns like this one straight to your inbox - click here!
![]()
The premier place for all your jewelry making needs. The best in wire, tools, cabochons, gemstone beads and more. As well as a superior resource for educational support to help build your jewelry making skills and techniques.
Connect With Us

® 2007 - 2024 Wirejewelry.com Powered by ClaimTheWeb Cart